
To clean the filter of a Shark vacuum, remove it from the vacuum, rinse it under running water, and let it dry thoroughly before reattaching it. Introduction (120 words): Maintaining a clean and efficient vacuum is essential for keeping your home free from dirt and dust.
One crucial aspect of vacuum maintenance is cleaning the filter regularly. Clogged filters can hinder the suction power of your vacuum and reduce its overall performance. If you own a Shark vacuum, learning how to clean its filter is a simple and effective way to ensure optimal cleaning results.
In this guide, we will walk you through the quick and straightforward process of cleaning the filter of your Shark vacuum. By following these steps, you will be able to keep your vacuum running smoothly, prolong its lifespan, and enjoy a clean and healthy environment for you and your family. So, let’s get started and learn how to clean the filter of your Shark vacuum efficiently.
Understanding Shark Vacuums
Shark vacuums are known for their efficient cleaning capabilities, and properly cleaning the filter is essential for optimal performance. To clean the filter of a Shark vacuum, simply remove it, rinse it under water, let it dry completely, and then reinstall it for continued powerful suction.
When it comes to keeping our homes clean and free from dust and debris, a reliable vacuum cleaner is a must-have. One brand that has gained popularity over the years is Shark. Known for its powerful suction and innovative features, Shark vacuums have become a trusted name in the industry. In this article, we will dive into the world of Shark vacuums, discussing the different types available and the importance of cleaning the filters.
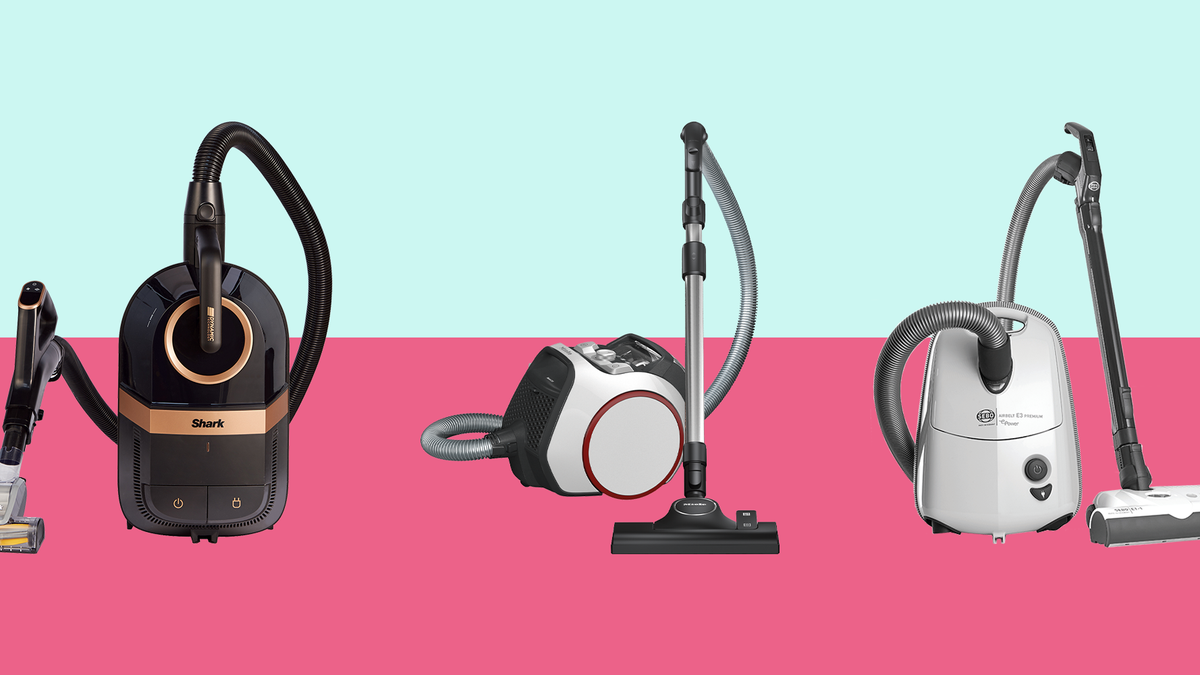
Types Of Shark Vacuums
If you are in the market for a Shark vacuum, you will come across several different models designed to cater to various cleaning needs. Let’s take a closer look at the most common types:
| Model | Description |
|---|---|
| Upright | These vacuums are great for deep cleaning carpets and offer excellent maneuverability. |
| Stick | Lightweight and easy to use, stick vacuums are perfect for quick clean-ups and hard-to-reach areas. |
| Canister | Canister vacuums provide versatility and are suitable for both carpets and hard floors. They come with a separate canister that houses the motor and bag. |
Filter Importance In Shark Vacuums
Filters play a crucial role in the performance and longevity of your Shark vacuum. They are responsible for trapping dust, allergens, and other particles, preventing them from being released back into the air. Clean filters not only ensure optimal suction power but also help maintain indoor air quality.
Shark vacuums generally come with two primary types of filters:
- Pre-Motor Filters: These filters trap large debris particles before they reach the motor, prolonging its life and preventing clogs.
- Post-Motor Filters: Positioned after the motor, these filters capture finer particles and allergens, contributing to cleaner air.
Regularly cleaning and maintaining the filters is essential for keeping your Shark vacuum running smoothly. Over time, these filters can get clogged with dirt and debris, which can impact the suction power and overall performance of your vacuum. Knowing how to clean the filters properly ensures your Shark vacuum continues to deliver exceptional cleaning results.
:max_bytes(150000):strip_icc()/the-best-vacuums-for-pet-hair-tested-by-real-simple-tout-daf1413030d646d88d128b75f088bf35.jpg)
Signs Of A Dirty Filter
If your Shark vacuum shows signs of reduced suction power or dust escaping when in use, it may be due to a dirty filter. To clean the filter, remove it from the vacuum and tap off the excess dirt. To deep clean, wash the filter with water, making sure it’s completely dry before inserting it back into the vacuum.
Regular maintenance of the filter will ensure optimal performance of your Shark vacuum.
If you own a Shark vacuum, it is crucial to keep its filter clean to ensure optimal performance. A dirty filter can significantly affect your vacuum’s suction power and even cause unpleasant odors. By recognizing the signs of a dirty filter, you can take immediate action and guarantee a clean and fresh environment in your home.
Loss Of Suction Power
One of the most noticeable signs of a dirty filter is a loss of suction power. When your Shark vacuum filter becomes clogged with dirt, dust, and debris, the airflow is obstructed. As a result, the vacuum’s suction power decreases, making it difficult to efficiently clean your floors and surfaces. If you find that your Shark vacuum is no longer picking up as much dust as it used to, it’s a clear indication that the filter needs cleaning.
Unpleasant Odors
An unpleasant smell emanating from your Shark vacuum can be a strong indication that the filter needs immediate attention. When the filter becomes congested with dirt and debris, it provides a breeding ground for bacteria, mold, and mildew. These microorganisms can produce foul odors that are then circulated throughout the air as you vacuum, resulting in an unpleasant experience for both you and your family. If you detect an unpleasant smell while using your Shark vacuum, it’s time to clean the filter and eliminate these unwanted odors.
Preparation
When it comes to maintaining the performance of your Shark vacuum, regular cleaning of the filter is essential. Prior to starting the cleaning process, it’s important to prepare and gather the necessary supplies as well as take the required safety precautions.
Gathering Necessary Supplies
- Soft-bristled brush
- Mild dish soap
- Clean, dry towels
- Access to water source
Safety Precautions
Before cleaning the filter, always unplug the Shark vacuum from the power source to avoid any electrical accidents. Additionally, ensure that the vacuum is cooled down completely to prevent any burns or injuries during the cleaning process.
Filter Removal
To clean the filter of a Shark vacuum, simply remove it from the unit, tap off any excess dirt, and wash it with mild soap and water. Let it dry completely before putting it back in place, ensuring long-lasting suction and efficient cleaning.
Removing and cleaning the filter of your Shark vacuum is an essential step to ensure optimal performance and prolong the life of your vacuum. Regular maintenance not only improves suction power but also helps to maintain a hygienic environment in your home. In this step-by-step guide, we will show you how to effortlessly remove the filter of your Shark vacuum for easy cleaning.
Step-by-step Guide
-
- Step 1: Power Off and Unplug
Before attempting to remove the filter, turn off the power and unplug your Shark vacuum from the power outlet. Safety should always be a top priority.
-
- Step 2: Locate the Dust Cup
Locate the dust cup on your Shark vacuum cleaner. This is usually a transparent container part of the vacuum body, which collects the dirt and debris sucked in during cleaning.
-
- Step 3: Release the Dust Cup
To remove the dust cup, press the release button or latch (depending on the model) on the top or side of the vacuum. This will release the dust cup from the vacuum body.
-
- Step 4: Empty the Dust Cup
Once the dust cup is detached, carefully empty its contents into a trash bag or bin. Dispose of the dirt and debris properly.
-
- Step 5: Locate the Filter
With the dust cup removed, the filter will be visible. Look for the filter at the top or bottom of the dust cup cavity.
-
- Step 6: Remove the Filter
Gently grip the filter and twist it counterclockwise (usually indicated by arrows or unlock symbols) to unlock it from its position. Lift the filter out of the dust cup cavity.
-
- Step 7: Clean the Filter
Once the filter is removed, it’s time to clean it. Rinse the filter with lukewarm water until the water runs clear. Avoid using harsh chemicals or detergents as they can damage the filter.
-
- Step 8: Dry the Filter
After rinsing, gently squeeze out excess water from the filter. Place it in a clean, well-ventilated area and let it air dry completely. This may take around 24 hours.
-
- Step 9: Reinsert the Filter
Once the filter is dry, align it with the cavity in the dust cup. Insert the filter and twist it clockwise (following the lock symbols) until it securely locks into place.
-
- Step 10: Reattach the Dust Cup
With the filter properly inserted, reattach the dust cup to the vacuum body. Align it with the vacuum and push it until you hear a click, indicating that it’s securely attached.
-
- Step 11: Power On
Finally, plug in your Shark vacuum and turn it on. Your vacuum is now ready for action with a clean and properly installed filter.
Filter Cleaning Techniques
Cleaning the filter of your Shark vacuum is essential to maintain its performance and prolong its lifespan. Regularly removing and cleaning the filter helps remove dust, dirt, and debris, ensuring optimal suction power. In this article, we will explore two effective filter cleaning techniques: Rinsing with Water and Using a Cleaning Solution.
Rinsing With Water
Rinsing the filter with water is a simple yet efficient method to remove dirt and debris. Here’s how you can do it:
- Turn off and unplug your Shark vacuum to ensure safety.
- Locate the filter compartment, usually at the top or bottom of the vacuum.
- Remove the filter from the compartment.
- Rinse the filter under running water, using mild water pressure. Ensure you cover the entire surface, especially the pleats, where dirt can accumulate.
- Gently squeeze the filter to remove excess water.
- Allow the filter to air dry completely. This usually takes about 24 hours.
- Once the filter is completely dry, reinsert it into the vacuum, ensuring it is properly seated.
By regularly rinsing your Shark vacuum filter with water, you can effectively remove trapped dirt and debris, ensuring your vacuum’s optimal performance.
Using A Cleaning Solution
Using a cleaning solution in combination with water can provide a deeper clean for your Shark vacuum filter. Here’s a step-by-step process:
- Follow the first two steps mentioned in the previous section to safely remove the filter from your Shark vacuum.
- Prepare a solution of warm water and mild detergent or dish soap.
- Submerge the filter in the solution and gently agitate it to loosen dirt and debris.
- Rinse the filter under running water to remove the cleaning solution, making sure to cover all areas thoroughly.
- Gently squeeze the filter to remove excess water.
- Allow the filter to air dry completely for about 24 hours.
- Once dry, reinsert the filter into the vacuum.
Using a cleaning solution can help remove stubborn dirt and stains, leaving your Shark vacuum filter fresh and ready for use.
Remember, regardless of the cleaning technique you choose, it is important to clean your Shark vacuum filter regularly. This will not only maintain suction power but also prevent the filter from becoming clogged, which can strain the motor and reduce overall efficiency. By following these filter cleaning techniques, you can ensure that your Shark vacuum continues to perform at its best.
Maintenance Tips
Regular maintenance of your Shark vacuum’s filter is crucial for optimal performance. By adhering to a consistent cleaning schedule, you can ensure that your vacuum maintains strong suction power and efficiently captures dirt and debris from your floors.
When it comes to regular cleaning, it’s essential to check the filter after every few uses. A timely cleaning schedule keeps the filter free from accumulated dust and allows the vacuum to operate at its best.
Proper assembly of the filter after cleaning is equally important. Ensure that the filter is completely dry before reinserting it into the vacuum. This prevents the growth of mold and mildew, which can impede the vacuum’s performance and pose a health risk.
Additionally, make sure to assemble the filter correctly according to the manufacturer’s instructions. Improper assembly can lead to air leaks and reduced suction power, degrading the vacuum’s effectiveness. By following these maintenance tips, you can ensure the longevity and peak performance of your Shark vacuum.
Troubleshooting
Despite the powerful suction prowess of a Shark vacuum, it may encounter a few hiccups along the way. Don’t worry – we’ve got you covered! Here are some common issues related to cleaning the filter, along with easy solutions:
Dealing With Persistent Odors
If you’ve noticed an unpleasant odor emanating from your Shark vacuum, it’s time to tackle it head-on. Lingering smells can be a result of trapped dirt, debris, or even mildew. Follow these simple steps to eliminate those pesky odors:
- Ensure the vacuum is unplugged and powered off.
- Remove the filter from the vacuum unit (refer to the user manual if needed).
- Thoroughly rinse the filter under cold running water.
- Apply a small amount of mild dish soap to the filter.
- Gently scrub the filter using your hands or a soft brush.
- Rinse the filter thoroughly again, ensuring all soap residue is gone.
- Allow the filter to air dry completely before reinserting it into the vacuum.
By following these steps, you can bid farewell to any unwelcome odors and enjoy a fresh-smelling cleaning experience with your Shark vacuum.
Addressing Filter Wear And Tear
Over time, the filters of your Shark vacuum may experience wear and tear, impacting their efficiency. Here’s how you can address this issue and ensure your filter performs optimally:
- Regularly inspect the filter for signs of damage or excessive clogging.
- If the filter is damaged, it’s important to replace it with a new one. Refer to the user manual for the specific filter model required for your Shark vacuum.
- If the filter is simply clogged with dirt and debris, rinse it under cold running water to remove the build-up.
- For stubborn dirt or debris, use a soft brush to gently dislodge and remove them.
- After cleaning, allow the filter to air dry completely before reinstalling it.
By regularly inspecting and maintaining your Shark vacuum’s filter, you can ensure its longevity and optimal suction power, allowing for consistently clean and efficient performance.
:max_bytes(150000):strip_icc()/fw-best-vacuums-tout-social-574ef213ad9f41d2a54cf9822709570b.jpg)
Alternative Cleaning Methods
When it comes to maintaining the efficiency of your Shark vacuum, cleaning the filter is essential. While the regular rinsing and cleaning methods work well, there are alternative ways to clean the filter as well. In this section, we will explore a few alternative cleaning methods that you can try to keep your Shark vacuum performing optimally.
Consideration Of Replacement Filters
Before we dive into alternative cleaning methods, it’s worth considering the option of replacing your filter altogether. Over time, filters can become worn out and clogged beyond repair, affecting the overall performance of your Shark vacuum. By replacing the filter with a new one, you can ensure maximum suction power and efficient cleaning. Remember to check your vacuum model’s specifications to determine the right replacement filter for your Shark vacuum.
Using Compressed Air
If you prefer a quick and easy cleaning method, using compressed air can be a great option. Compressed air blasts away dust, debris, and any other particles that might be trapped in the filter, restoring its efficiency. To use this method, follow these steps:
- Remove the filter from your Shark vacuum.
- Take the compressed air canister and hold it at a safe distance from the filter.
- Direct the air flow towards the filter and blow the air through it.
- Continue blowing the air until you see all the dust and debris being expelled from the filter.
- Once the filter is clean, reattach it to your Shark vacuum and you’re ready to go.
By using compressed air, you can effectively remove stubborn dirt and maintain the suction power of your Shark vacuum.
Maximizing Filter Lifespan
The key to a long-lasting and efficient Shark vacuum filter is proper maintenance and care. By understanding the importance of maintaining a clean filter, you can ensure not only the longevity of your vacuum but also the quality of the air in your home. Here are some essential tips for maximizing the lifespan of your Shark vacuum filter.
Proper Vacuuming Techniques
Vacuum in slow, steady strokes to effectively pick up dirt and debris without causing excessive strain on the filter.
Regularly inspect the filter and clear away any visible debris to prevent clogging and reduced suction power.
Utilize the appropriate attachments for different surfaces to prevent excessive debris accumulation in the vacuum filter.
Avoiding Fine Particle Accumulation
Be mindful of vacuuming fine particles such as dust and pet dander, which can quickly clog the filter.
Empty the dust cup frequently to prevent fine particles from reaching the filter and causing blockages.
Consider using a pre-filter to capture smaller particles before they reach the main filter.
Environmental Impact
To clean the filter of a Shark Vacuum and reduce its environmental impact, start by unplugging the vacuum and removing the dust cup. Next, take out the filter and rinse it under cold water until it is clean. Allow the filter to air dry completely before reinserting it back into the vacuum.
This simple maintenance routine helps to keep your vacuum running efficiently and prolong its lifespan.
Environmental Impact Cleaning the filter of your Shark vacuum not only helps maintain its performance but also has a positive impact on the environment. By properly disposing of old filters and adopting eco-friendly cleaning practices, you can minimize waste and contribute to sustainability. Let’s take a closer look at both aspects.
Disposal Of Old Filters
When your Shark vacuum’s filters reach the end of their lifespan, it’s essential to dispose of them responsibly. Simply throwing them in the regular trash can contribute to increasing landfill waste. Instead, consider recycling or repurposing the filters to reduce their environmental impact. Here are a few options for disposing of old Shark vacuum filters:
- Check with your local recycling facility to see if they accept vacuum filters for recycling.
- Look for specialized filter recycling programs or initiatives in your area. Many organizations collect filters for recycling purposes.
- If recycling is not available, consider repurposing the old filters. For example, they can be used for DIY projects like creating air fresheners or as padding material for delicate items during moving.
Eco-friendly Cleaning Practices
In addition to proper filter disposal, adopting eco-friendly cleaning practices can further minimize your environmental impact. Here are some tips to make your cleaning routine more sustainable:
- Choose environmentally friendly cleaning products that are free from harmful chemicals. Look for biodegradable and non-toxic options.
- Opt for reusable microfiber cloths instead of disposable paper towels to reduce waste.
- Consider using natural cleaning solutions, such as vinegar and baking soda, which are effective and safe for both your health and the environment.
- Regularly empty your vacuum’s dust bin or bag into a composting bin if possible. This helps divert organic waste from landfills and promotes nutrient-rich soil.
- Reduce energy consumption by using your Shark vacuum efficiently. Vacuum in short bursts rather than leaving it on for extended periods when not needed.
By incorporating these eco-friendly practices into your cleaning routine, you can help minimize waste, reduce the use of harmful chemicals, and contribute to a healthier environment. Cleaning your Shark vacuum’s filter is not only beneficial for its performance but also a step towards a more sustainable future. Remember, small actions can make a big difference!
Frequently Asked Questions Of How Do You Clean The Filter Of A Shark Vacuum
How Often Should You Clean The Filter Of A Shark Vacuum?
It is recommended to clean the filter of your Shark vacuum every 3 months or when it appears dirty.
What Is The Best Way To Clean The Filter Of A Shark Vacuum?
To clean the filter of your Shark vacuum, remove it from the vacuum, tap it gently to remove loose dirt, and rinse it under running water. Allow it to fully dry before reattaching it.
Can You Wash The Filter Of A Shark Vacuum?
Yes, you can wash the filter of a Shark vacuum. Rinse it under running water until the water runs clear, and make sure to let it dry completely before putting it back in the vacuum.
What Should I Do If The Filter Of My Shark Vacuum Is Damaged?
If the filter of your Shark vacuum is damaged, you should replace it with a new one. Damaged filters can affect the performance of your vacuum.
How Does Cleaning The Filter Of A Shark Vacuum Improve Its Performance?
Cleaning the filter of a Shark vacuum regularly improves its performance by preventing clogs and maintaining suction power. It also helps to prolong the life of the vacuum.
Conclusion
Maintaining your Shark vacuum filter is crucial for optimal performance. By regularly cleaning the filter, you can ensure efficient suction and a longer lifespan for your vacuum. Following the simple steps outlined you can easily maintain your vacuum and keep your home clean and healthy.
Don’t neglect this essential maintenance task!